Washi Tape Ideas
Rongrong DeVoeWe've spent years surrounded by vibrant crafting supplies, and one product that continues to stand out is washi tape. Its variety of colors, textures, and patterns makes it a favorite for projects both big and small.
In this article, we'll explore what washi tape is, how to use it effectively, and the basic supplies that make creating easier. We'll also share practical washi tape ideas for everyday use and fun activities that kids can enjoy. From decorating notebooks to wrapping gifts, there's something here for every crafter who wants to add a personal touch.
What this article covers:
- What Is Washi Tape?
- How to Use Washi Tape
- What You'll Need for Creating with Washi Tape
- Washi Tape Ideas for You
- Washi Tape Ideas for Your Kids
- Washi Tape Ideas (FAQs)
What Is Washi Tape?
So, what is washi tape? Washi tape is a decorative adhesive made from traditional Japanese washi paper. It's lightweight, flexible, and incredibly easy to work with. Unlike many other tapes, it can be lifted and repositioned without leaving behind a mess. That makes it perfect for experimenting.
The real magic is in the variety. Washi tape comes in endless colors, widths, and patterns, so there's always something new to try.
At Shop Rongrong, we offer a huge range of fashionable, seasonal designs of both pet tape and washi tape. It's an ideal way to brighten journals, personalize gifts, or refresh everyday items.

How to Use Washi Tape
After using it for a variety of projects, we know how to use washi tape well. Here's what to do:
- Choose your surface carefully. Washi adheres best to clean, dry, flat surfaces. If the surface is dusty, won't lie flat, or is very textured, the tape might not stick evenly or peel off later.
- Plan your layout. Before sticking the tape, lightly mark where you want stripes, borders, or patterns. Especially if you want symmetry or want to align edges. This helps avoid crooked lines or overlapping that looks messy.
- Cut clean edges. Use sharp scissors or craft knives. Some washi tapes tear nicely by hand, but a clean blade gives more precise lines, especially if you're working on small shapes or details.
- Layer and mix. One of the joys of washi tape is combining patterns and colours. Try layering transparent or semi-transparent designs for depth. Mix widths to add variety.
- Seal edges or corners (optional). If the project will be handled a lot (e.g. mug, phone case, a tray), consider sealing the edges with a clear sealant or varnish. This protects your work from peeling, washing, or constant touching.
- Remove gently or reposition. One advantage of washi is that it tends to be repositionable. If you place something slightly wrong, peel it up and re-stick. Do so carefully to avoid stretching or tearing.

What You'll Need for Creating with Washi Tape
Here are the tools and supplies you'll want to have on hand:
- A variety of washi tapes: different widths, patterns, textures, colours
- Scissors (small detail scissors and larger ones)
- Craft or precision knife (for trimming edges or cutting shapes)
- Cutting mat (protects your surface)
- Ruler and pencil (for measuring and marking)
- Adhesive or sealant if needed (glue, decoupage medium, varnish)
- Plain surfaces to decorate: notebooks, mugs, picture frames, jars, etc.
- Optional extras: paper or cardstock, paint, embellishments like beads or string
Washi Tape Ideas for You
Here are some ideas we think are especially inspiring. Each one is something we've either made ourselves or seen from talented crafters using our products:
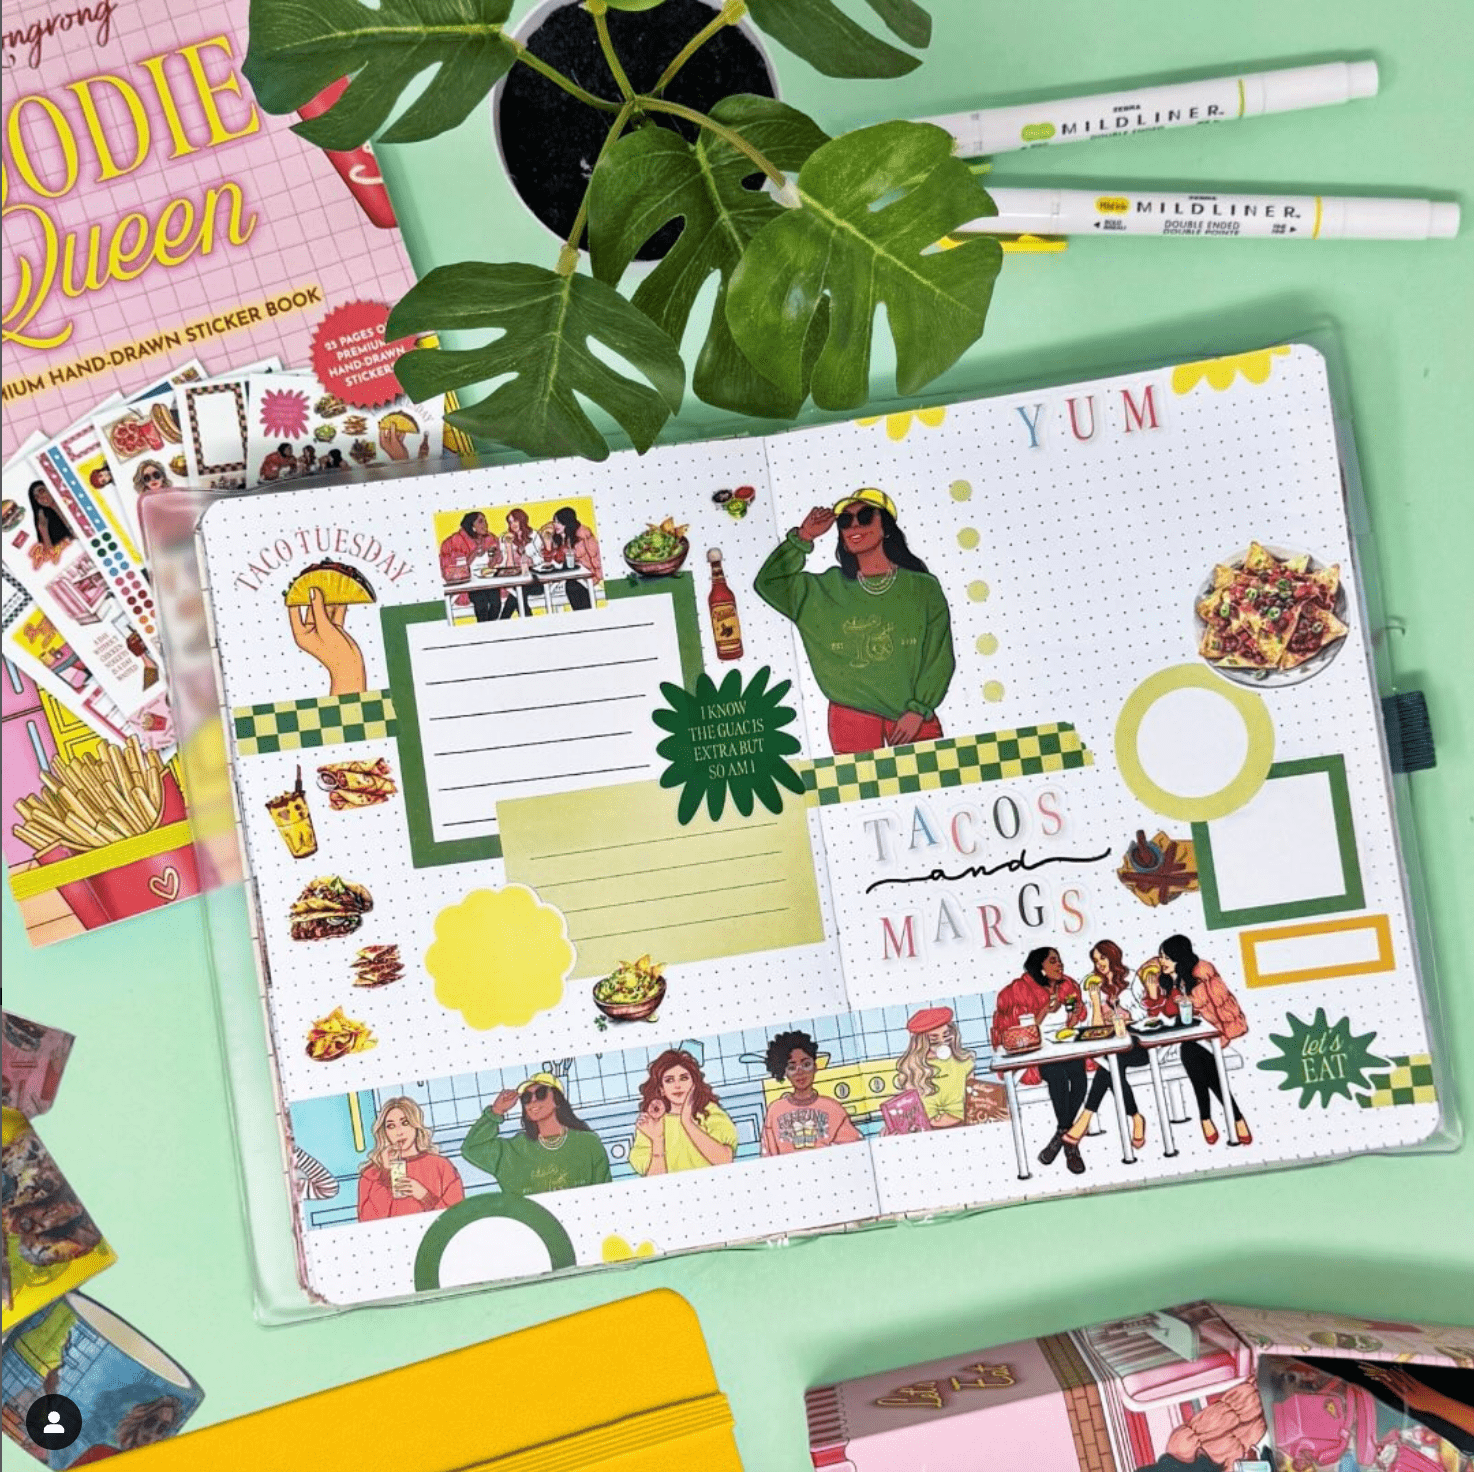
1. Notebook and Journal Decoration
Adding washi tape to notebooks or journals is one of the quickest ways to give them personality. Try layering different widths on the cover to create stripes or borders.
You can also use washi inside journals to highlight sections, divide pages, or frame special entries. It makes daily writing or planning more enjoyable, and every time you open your notebook, you'll feel a little burst of creativity.
2. Handmade Greeting Cards
Washi tape is perfect for turning plain cardstock into something truly personal. Create geometric shapes by layering tape in triangles or squares. Use soft florals to craft borders or add polka dot tape for a playful touch. Pair the design with hand lettering or stamped words for a custom feel.
From birthdays to thank-you notes, a handmade card decorated with washi has extra charm. It's a thoughtful way to show someone you care, and it doesn't take long to pull together.

3. Gift Wrapping Accents
Simple wrapping paper instantly transforms with a few strips of washi tape. Add vertical or horizontal bands to mimic ribbons, or layer patterns diagonally for a striking effect. Create mini flags by folding tape over twine and attaching it across a package. Even sealing an envelope flap with a patterned strip makes the presentation more stylish.
From our experience, people notice those little details. It's proof that wrapping doesn't need to be complicated to look polished and beautifully done.
4. Upcycled Photo Frames or Picture Frames
Washi tape makes old frames feel brand-new with very little effort. Smooth the surface, then add strips along the edges or across the entire border. Bold colors can turn a neutral frame into a statement piece, while pastels work beautifully for soft, cozy spaces. Mixing tape widths in a stripe pattern adds a playful touch.
It's a satisfying weekend project that changes how photos or art prints look on display. Suddenly, that forgotten frame becomes something you're proud to hang.
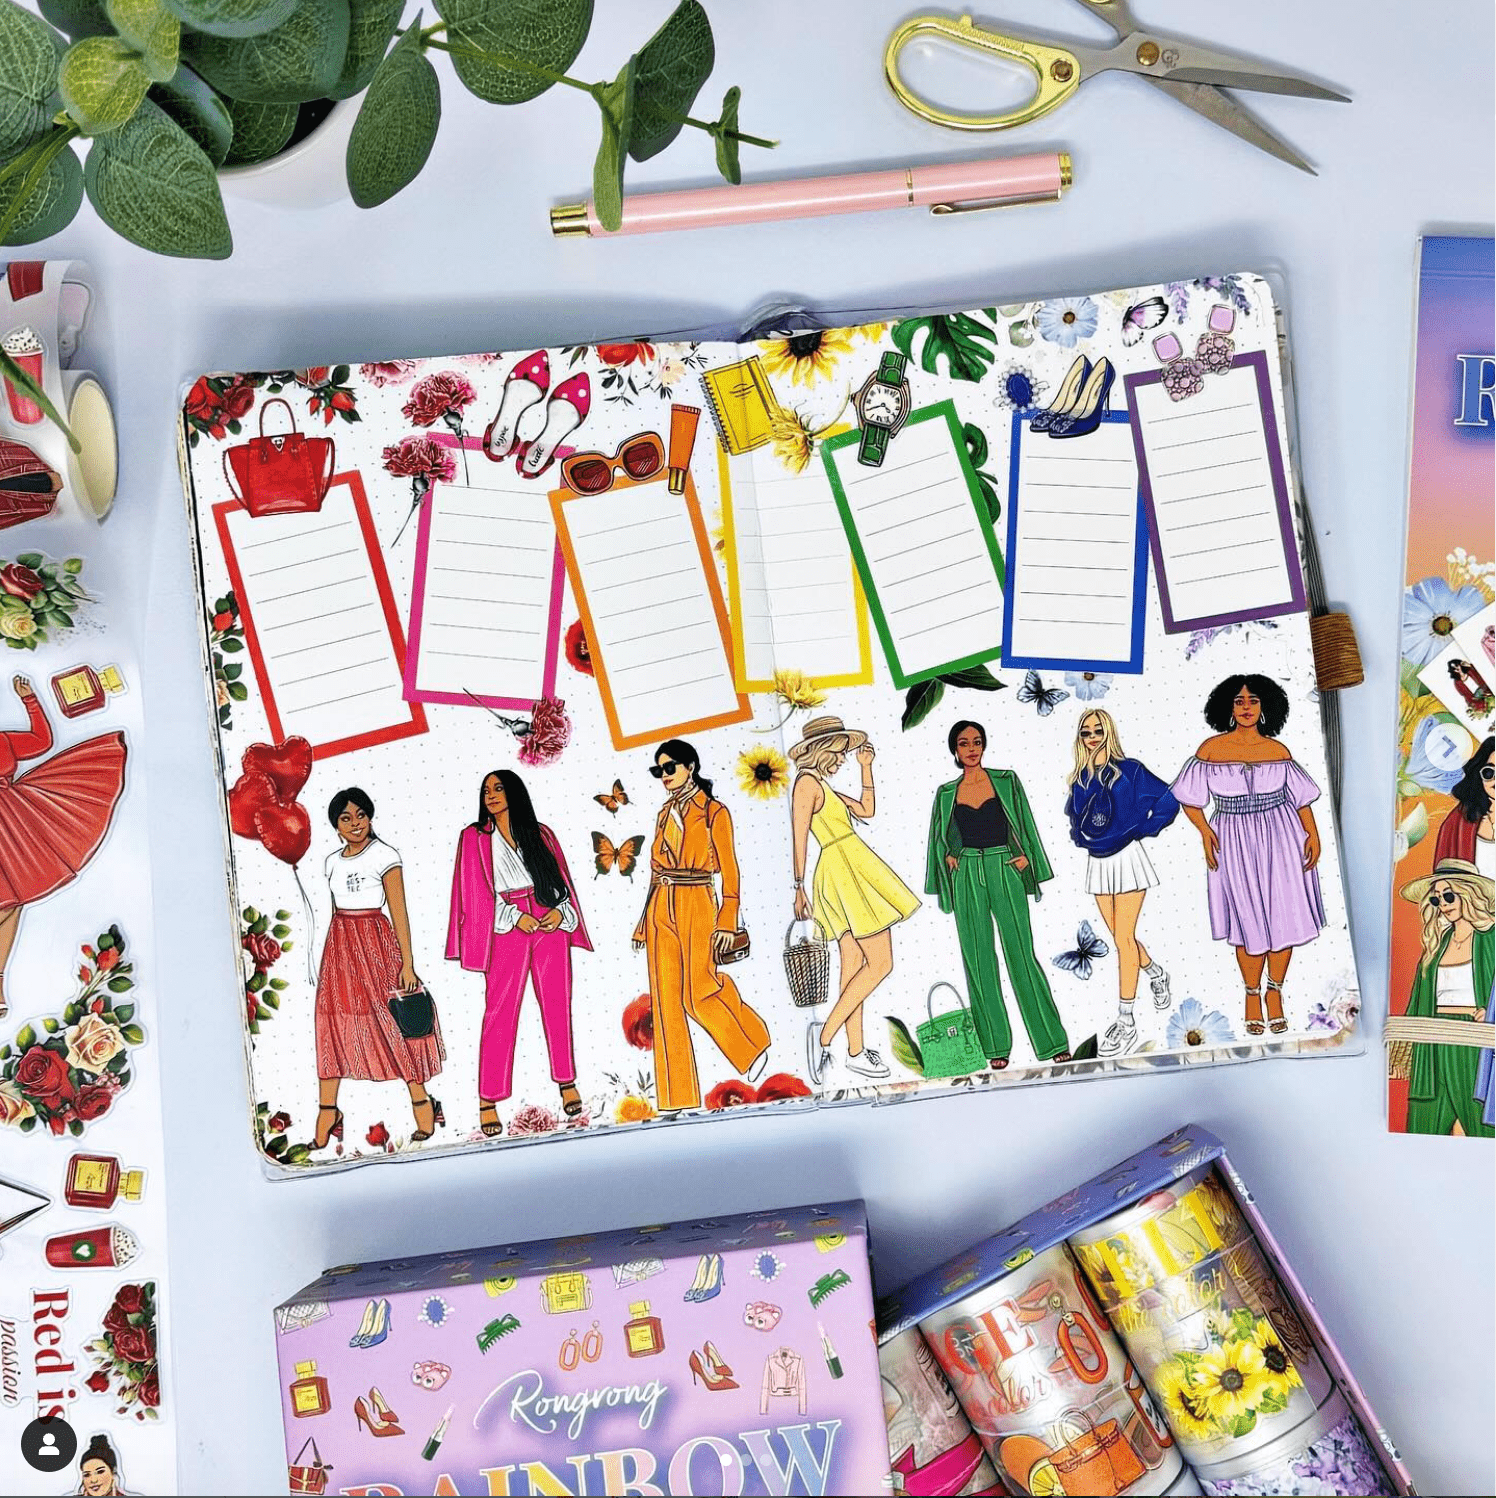
5. Scrapbooking
Washi tape is one of the most versatile scrapbooking supplies you can keep on hand. Use it to frame photos, create tabs for sections, or add borders to pages. Patterned tape can double as decorative “washi stickers” when cut into shapes. Layer transparent designs over photos for extra dimension, or use thin metallics to outline important details.
It's easy to reposition if you change your mind, which makes experimenting fun. Scrapbooking becomes more dynamic and personalized with just a few rolls of tape.

6. Custom Plant Pots or Home Décor Items
Decorating plant pots with washi tape brings personality to even the simplest containers. Wrap strips horizontally around a clay pot for a striped effect or cut small triangles to create a geometric pattern. We've also seen tape used on candle holders, trays, or drawer knobs for a subtle pop of color.
For items handled frequently, add a layer of sealant to keep the tape in place. These small touches make everyday décor brighter, and they're a fun way to refresh your space.
7. Washi Tape Wall Art
If you're looking for something unique, try creating a piece of wall art entirely out of washi tape. Map out a design, like a city skyline, geometric pattern, or abstract shapes, directly on canvas or sturdy cardstock. Apply strips carefully, then trim for clean edges.
You can stick with one color palette or mix bold prints for an eclectic look. Once finished, frame your creation or hang it as is. It's a budget-friendly way to add custom art to your home.
Washi Tape Ideas for Your Kids
Kids love things they can touch, peel, and create. These ideas are safe, fun, and usually low-mess. Based on what we've seen, these are hits:
1. Washi Tape Wrapped Pencils or Pens
This project is quick, easy, and gives kids something they'll use every day. Let them choose their favorite washi tape patterns, then wrap pencils or pens from top to bottom. It's simple for small hands and builds confidence. Once the tape is in place, trim the ends for a clean finish.
You can add a layer of clear sealant to make them more durable. Suddenly, ordinary school supplies feel custom, and your child will be excited to show off their creations.

2. Picture Frames with Popsicle Sticks
Kids love crafts they can proudly display, and this one's a favorite. Start by gluing Popsicle sticks together to form a frame, then let your child cover the sticks with washi tape. They can mix bright patterns, add stripes, or keep it simple with one design.
Once the frame is decorated, insert a photo, drawing, or even a favorite card. Hang them on the wall or prop them on a shelf. These frames quickly become keepsakes, and kids enjoy seeing their art on display.
3. Wall Murals or Accent Strips
Transform a blank wall or large poster board into something exciting with washi tape. Sketch a simple outline of a tree, rainbow, or geometric pattern, then let kids fill it in with strips of tape. The process is engaging because they get to pick colors and decide where each strip goes. Trimming the edges gives the mural a neat finish.
It's a project that feels big and creative but doesn't require expensive supplies. Kids are thrilled to see their artwork brighten a space.
4. Magnetic Bookmarks
These bookmarks are practical and fun to make. Cut cardstock into a small rectangle, fold it in half, and let your child decorate the outside with washi tape. Patterns can be bold or subtle, and layering adds texture. Inside the fold, attach two small magnets so the bookmark snaps around a page.
It's satisfying to use and makes reading time more special. Kids enjoy gifting these too, since they're simple to make in multiples. It's a little project with a big payoff.

5. Tealights or Mini Decor
Even the smallest items can become magical with washi tape. Wrap the outside of glass tealight holders or mini jars with patterned strips, then let kids experiment with layering designs. When a candle or LED light shines through, the colors glow beautifully. Kids love seeing the transformation happen instantly.
Make sure to use child-safe adhesives if you're sealing the tape. These mini creations are perfect for parties, playrooms, or as gifts for family. They're easy to craft but feel surprisingly special.
7. Washi Tape Picture Collages
Give kids a stack of plain paper or cardstock and let them create collages using torn or cut pieces of washi tape. They can layer strips to form shapes like hearts, stars, or animals. Encourage them to outline the shapes with markers for extra detail.
This activity is especially good for rainy days because it's mess-free and keeps them busy. The results are bold, colorful pieces they'll be proud to hang on the fridge or share with friends and family.
8. Washi Tape DIY Crowns
Every child loves dress-up, and making their own crown adds to the excitement. Cut a strip of cardstock or poster board to fit their head, then let them decorate it with washi tape. Stripes, polka dots, or even metallics make it shine. Add stickers or small gems if they want extra sparkle.
Tape the ends together to finish the crown, and it's ready to wear. Kids enjoy the process just as much as parading around with their new creation afterward.
Conclusion
Washi tape is simple to use but endlessly versatile, making it a favorite for both everyday crafts and special projects. It works beautifully on notebooks, cards, gifts, décor, and even fun kids' activities like bookmarks and crowns. With just a few rolls, you can add color, texture, and personality to almost anything in your home.
The best part is how approachable it feels, no matter your skill level. If you're ready to try these ideas, explore our collection of washi tape and stickers at Shop Rongrong today.
Washi Tape Ideas (FAQs)
How long does washi tape last?
When applied to clean surfaces, washi tape can last for months or even years. For items handled often, sealing helps extend its life.
Is washi tape reusable?
It depends. Washi tape can usually be peeled off and repositioned a few times, but it may lose stickiness after repeated use.
Can washi tape go on walls without damage?
Yes, it typically removes cleanly from painted walls. However, test a small area first to ensure your paint finish isn't sensitive.