How to Use PET Tape in Your Journal and Planner
Laurence DeerWhether you are decorating a journal spread or setting up your weekly planner, PET tape is one of those supplies that works beautifully in both. It is translucent, which means you can layer it over writing, photos, and stickers without covering anything up. It is pre-cut into individual design elements, so you have real control over exactly what goes where on your page. And it adds that polished, dimensional look that makes a spread feel intentional rather than just decorated. If you want to see what is available before you dive in, browse the PET tape collection and then come back here for ideas on how to use it.
Start by understanding how pre-cut PET tape works
The first thing to know is that PET tape comes in two main types: full sheet, where you use the entire strip as one piece, and kiss-cut, where individual design elements are already cut out on the backing sheet ready to lift and place. Our PET tape is kiss-cut, which is honestly the more versatile option for both journaling and planning. Instead of committing to a full strip, you can pull out just the elements you want — one floral detail, a small accent, a single image — and place each one exactly where it fits on your page. Keep the backing on while you plan your layout, then peel and place one piece at a time. That way you are not trying to reposition something sticky mid-spread.

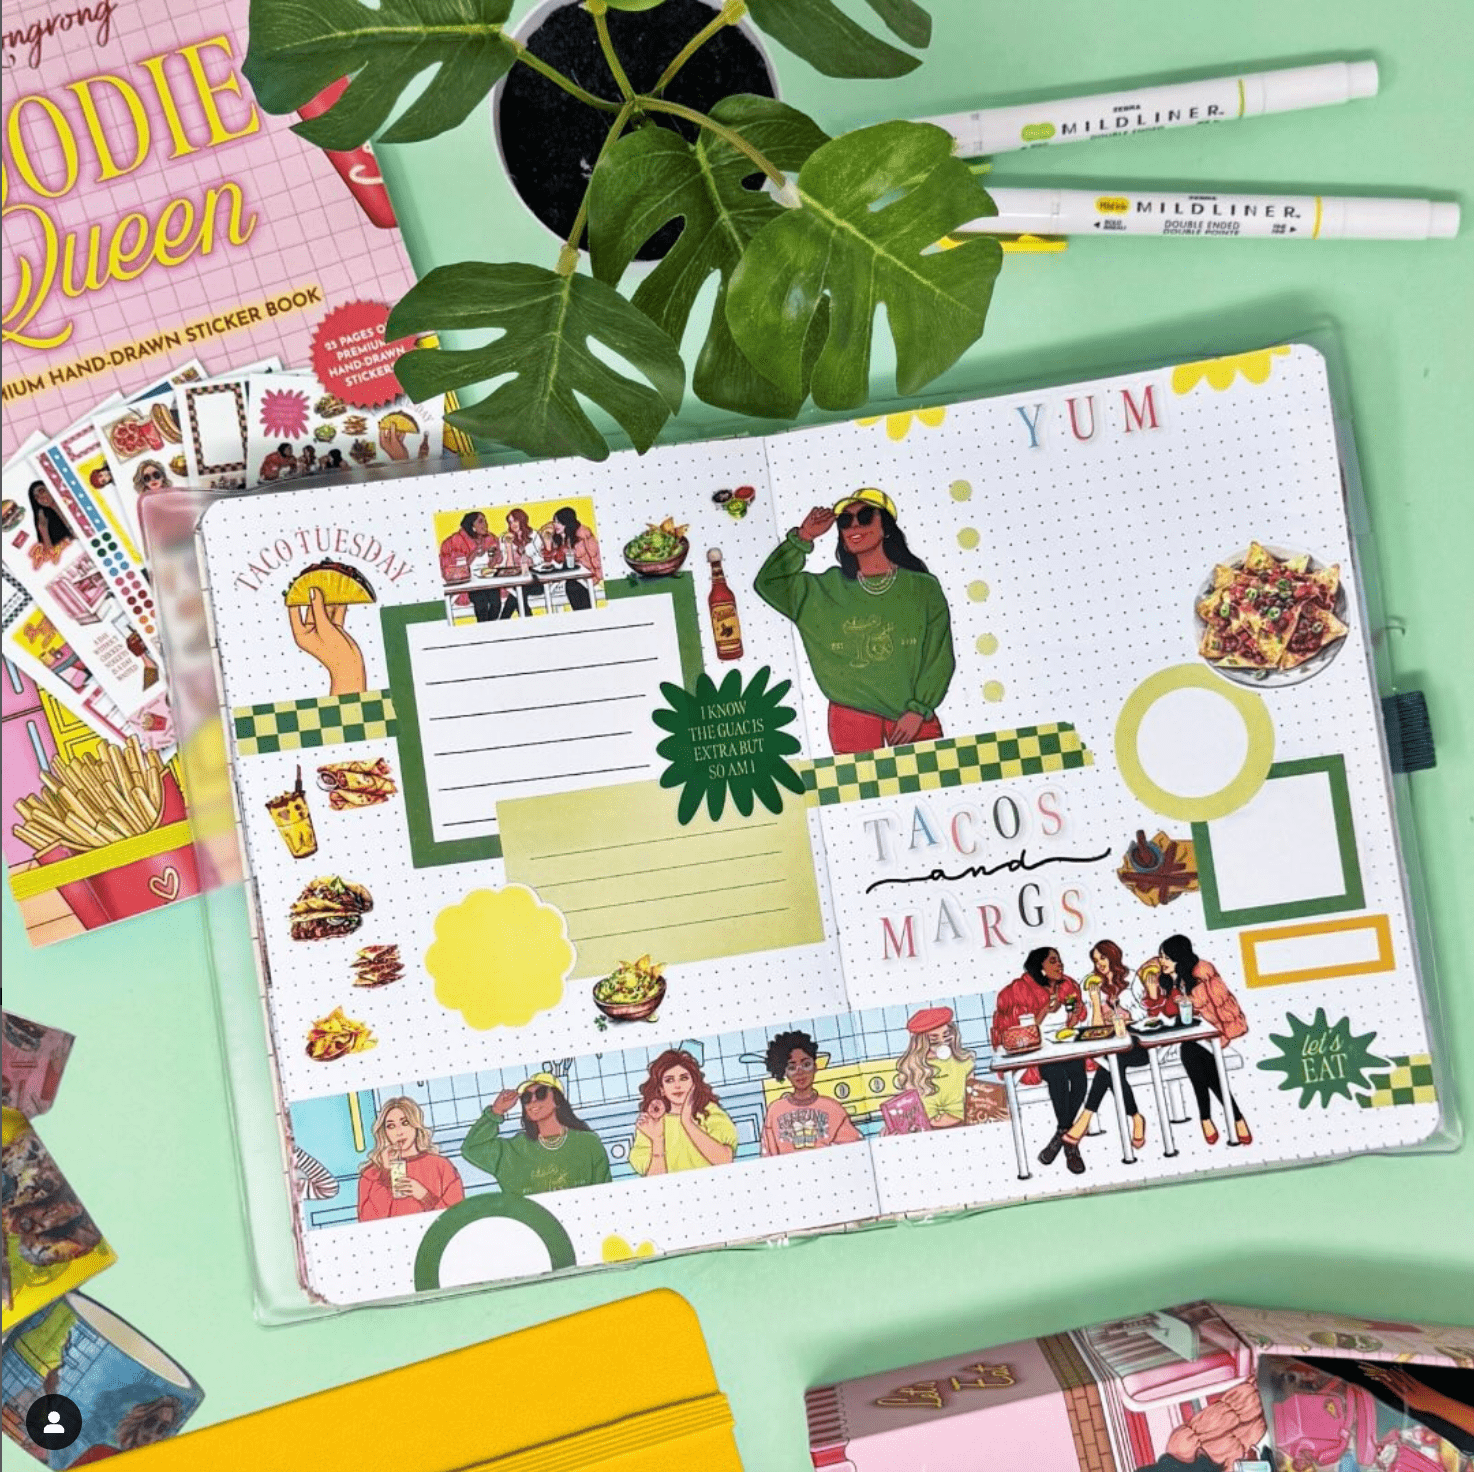
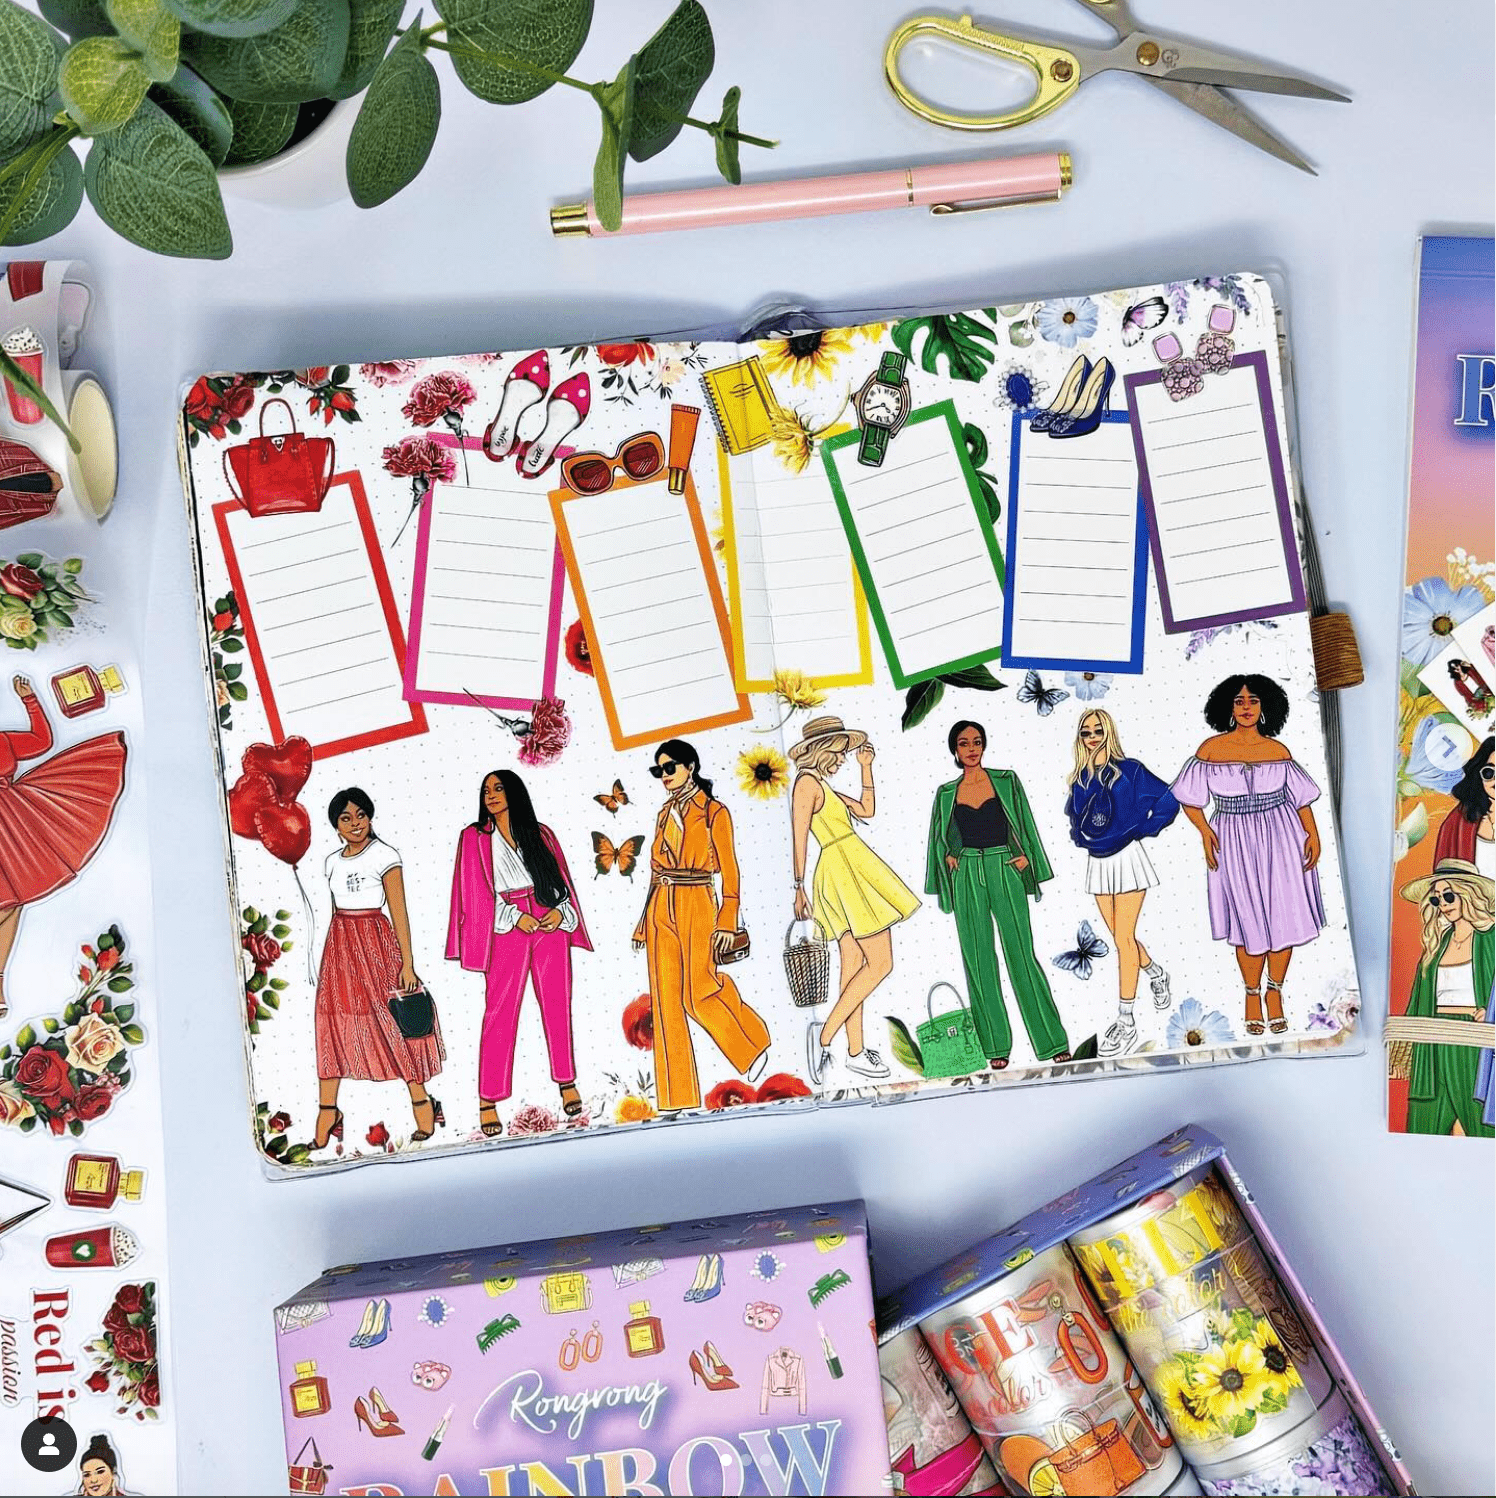
Use it to decorate journal spreads without overpowering them
In a journal, PET tape works best when it supports the page rather than competing with it. Because it is translucent, you can layer it right over handwriting or photos and the content underneath still shows through. Try placing a few elements in one corner to anchor the page, running a strip of designs along the top as a decorative header, or building a small layered cluster beside a memory or entry you want to highlight. The see-through quality is what makes it different from any paper-based supply — it adds depth and texture without adding visual weight, so even a heavily decorated journal page can still feel light and personal.
For more ideas on how decorative layers can come together on a journal page without creating clutter, these journaling decoration ideas are a great starting point.
Bring it into your planner for decoration that still works
In a planner, the goal is a little different — you want pages that are beautiful but still functional. PET tape fits that perfectly. Use individual kiss-cut elements to mark the top of a weekly spread, add a small accent beside a habit tracker, or frame a monthly dashboard without covering any of your actual planning content. Because each piece is small and precise, you are adding personality without sacrificing usability. Pair your tape with planner stickers to build out a cohesive spread — tape first as your background layer, stickers on top, and your planning content filling in around them.

If you use a Hobonichi or similar compact planner, PET tape is especially useful because the individual elements are sized to add detail without overwhelming a smaller layout. Plan a cozy functional Hobonichi spread shows exactly how decorative details and real planning function can share the same page.
Layer onto acetate or vellum for more creative options
Once you are comfortable placing PET tape directly on paper, acetate and vellum open up new possibilities for both journals and planners. Placing tape elements onto a piece of acetate gives you a completely see-through panel that works beautifully as a decorative insert or divider page. Vellum gives you a softer, frosted effect — you can still see through it, but the look is more subtle and layered. Both let you add dimension to your pages in a way that feels a little more considered than a standard spread, and neither requires any tools beyond what you are already using.
Create pockets that are both decorative and functional
This is one of the most satisfying things you can do with PET tape in either a journal or a planner. Fold a piece of tape over the edge of a page and adhere it to the back to create a slim pocket for notes, cards, or small inserts. Because the tape is see-through, you can actually see what is stored inside without opening anything — which is genuinely useful in a planner where you might be tucking in sticky notes or weekly inserts. In a journal it works just as well for holding mementos, printed photos, or anything you want to keep with a specific entry without gluing it down permanently.
PET tape vs washi tape — which one do you actually need?
This comes up a lot, so here is the honest answer. Washi tape is paper-based — it has a softer, more matte finish and you use it in strips without any backing paper process. It is great for simple borders, section dividers, and easy everyday decoration in both journals and planners. PET tape is plastic film — translucent, more polished, and designed to be layered and built with rather than just placed as a strip.
The two genuinely complement each other on the same page: washi for soft background structure, PET tape for the detailed, dimensional elements on top. If you want to go deeper on washi before comparing, what is washi tape is a good read, and what is washi tape used for and washi tape ideas will show you how to use both to their full potential.
We have full blog on this topic, which you can read here!
Start small and build from there
You do not need a fully decorated spread to start getting value out of PET tape. Pick one element from the sheet, place it somewhere on your page — beside a date, above an entry, in the corner of a weekly layout — and see how it feels. That is it. Less pressure, less perfection. Once you see how the translucency works and how a single well-placed piece can change the whole mood of a page, you will naturally start reaching for it more. The goal is pages you actually want to come back to, whether that is to write in them or to plan in them.